At first, I thought to myself, I don't really do anything specific. Half the time I don't even have a plan. I just go out and take pictures of whatever happens in front of my lens and then later go into Lightroom and Photoshop and mess around until something cool shows up. Then the more I thought about it, the more I started to realize that's not always true. There are some specific things I usually do, depending on the pictures. So here, I will attempt to show you!
The first thing I'll talk about is eyes. Eyes are often the most important and focused upon aspect of portraits, especially close ups. They are the window to the soul after all right? No one wants foggy and blurry windows. Here are some examples of what this effect can do.
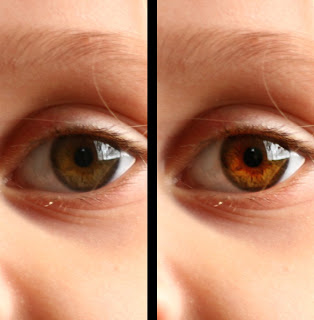
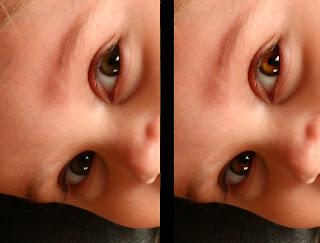
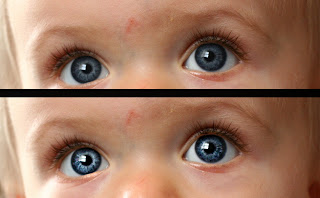 Now let me start out saying that this does not work with every photo, and the results are always different. But sometimes you get amazing results. Anyhow, onto how you do this eh?
This is ridiculously simple. It involves but two tools in photoshop.
Dodge and Burn.
-First, open the image and then duplicate the image in the layers pallet. You'll be working on the top layer, obviously.
-Take the Dodge tool and up top change the range to 'highlights' and set the exposure to about 25.
-Now go over the eyes about 2 times (the number of times is completely variable. Sometimes I only go over once, sometimes I go over several)
-Then switch over to the Burn tool, and set the range to "shadows' and exposure to around 12. Go over the eyes again. I usually use the burn tool only half as many times as I used the Dodge.
Now, it could very well be done right then, you have to be the judge. You just have to mess around with how many times you go over, and the exposures you use. Usually after I Burn it, I go back and Dodge it.
-I then usually go over to my layers pallet again and lower the opacity of the layer you edited to whatever I think it looks best. If you don't do this, the eyes tend to look too extreme I find. Lowering the opacity makes it look more natural while still letting them pop.
Some other things I feel might be helpful. This is tricky with brown eyes. They often come out looking red. I would suggest messing around with the hue/saturation (Image>Adjustments>Hue/saturation) to try and make them appear more natural if you wish. Usually however if you go in and later adjust the pictures color (for the examples, nothing else was touched) or even before hand and do the eyes last, the creepy scary evil redness goes away. Sometimes this process changes the original color of the eye (or rather, brings out less prominent colors) giving a very awesome effect, such as this.
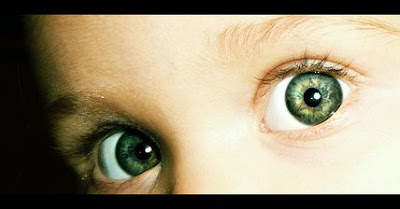 (These eyes belong to the same subject as the first two examples)
This also works very well with black and white and monotone pictures, because you don't really have to worry about distorting the color and you can contrast it out to your hearts content.
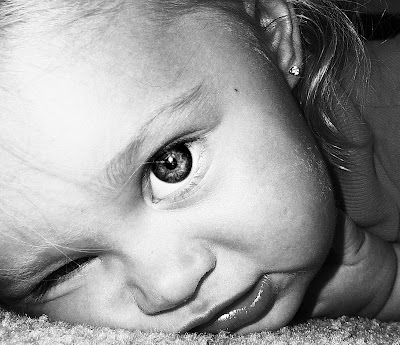
Ok, shameless self promotion. Here are some shots I've done using this technique.
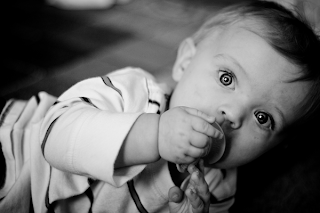
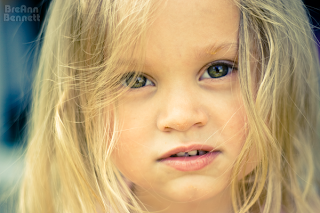

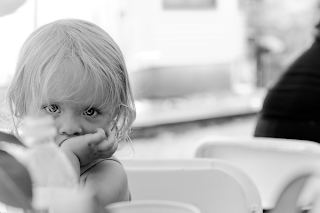
Well, hopefully my first blog will do some good. Enjoy.

omg!!!! I'm definitely trying this! I've been waiting for a tutorial on eyes photoshopping for DECADES!
ReplyDeleteBrean! I love you so much!
HAVE A GALACTIC HUG!
Very neat I will indeed have to try this!
ReplyDeletethankxxxx!!!
ReplyDeleteSUPER COOL THANKS VERY VERY MUCH!
ReplyDeleteawesome, thank you
ReplyDeletegood tutorial!
ReplyDeleteim using it in some portrait that i just took.
thnks!
fernando (brazil)
I used to do something similar until I started using a new layer, 50% grey overlay, and painting in highlights and shadow with a soft brush with a 3% flow setting. You get a great deal more control from it.
ReplyDeleteA good third step to highlight specific areas is to paint them in in white, pick out any highlights and set the layer to Overlay and adjust opacity as desired.
Danny
Daniel Meadows Retouching and Digital Art